Getting started · Mapping Kit
Set up your kit,
step by step.
From unboxing to your first compliant temperature mapping report - this guide covers every step, in order.
Before you begin
Have these four things ready before starting.
Mapping Kit received
Loggers, Basestation, Live Data Hub, antennas, power supplies, and sensors - verify everything is present before starting.
Mapping Software login
Your account must exist in Eupry Monitoring first, then open Mapping Software at app.eupry.com. Browser-based - no install needed.
Open Mapping SoftwareQualification plan
Logger positions, sensor count, study duration, and acceptance range - your protocol before placing a single logger.
Download a templateInternet for your device
Your laptop needs a connection throughout the study. The Live Data Hub manages its own 4G/Wi-Fi link to Eupry Cloud separately.
What this guide covers
Nine steps, four phases — preparation, execution, reporting, and wrap-up.
Step 01
What is in your kit
Verify every component before connecting anything - loggers, sensors, Basestation, Live Data Hub, antennas, and power supplies.
View component data sheetsStep 02
Connecting your Basestation and loggers
Power on the Basestation, wait for a steady green LED, then connect each logger and confirm it appears online in the Mapping Software.
Having trouble connecting?Book a live setup call with our team View component data sheetsStep 03
Getting into the Mapping Software
Log in to Mapping Software and get oriented - including how to tell the mapping system from the monitoring system at a glance.
Step 04
Configuring your study
Set your mapping name, timezone, dates, measurement type, and acceptance levels - all before placing a single logger.
Do not have a qualification plan?Download a template hereStep 05
Placing loggers and starting the study
Place loggers per your qualification plan, confirm each shows a green Wi-Fi icon, allow 24 hours to stabilize, then activate the study.
Need more loggers for your space?Add them to your current orderStep 06
Monitoring a live study
Check that every logger is recording and connected - catching a dropout now prevents an invalid study and a costly restudy.
Step 07
Generating your mapping report
Set the exact time window, select your sensors, save the report, and understand every element: graph, summary table, box plot, extrema, and excursions.
Step 08
Completing your documentation package
Download your PDF report and calibration certificates, complete your IQ/OQ/PQ templates, and confirm your audit file is defensible.
Need help with qualification docs?Book a CQV specialistStep 09
Returning your kit
Request a prepaid return label, repack all components in the original packaging, and drop off or arrange collection.
Your mapping identifies the risk zones. Monitoring keeps them in check.Switch to continuous monitoring with EupryWhat comes next?
Your mapping study is complete. Two paths forward — both lead to ongoing compliance.
Switch to continuous monitoring
Your mapping identified the hot and cold spots. Leave a handful of loggers in those positions and convert to an Eupry monitoring subscription, so those spots stay covered between mapping cycles – no new hardware needed.
Explore monitoringPlan your next mapping
Your Mapping Kit can map more than one piece of equipment or facility. Switch to a subscription and keep it on hand, packed and ready the moment your next mapping is due.
Ready to return your kit?
We handle the shipping label - pack everything up and hand it to the courier.
Request return label- 1
Request your label
Contact us and we will email a prepaid shipping label within one business day. No label is included in the kit.
- 2
Pack all components
Repack everything in the original packaging: all loggers, the Basestation, the Live Data Hub, three antennas, power supplies, and sensors.
- 3
Drop off or arrange collection
Use the prepaid label to drop the parcel at the carrier drop-off point shown on the label, or schedule a pickup.
Guide complete
Your onboarding is done.
Your mapping study is complete and your documentation is audit-ready. Access your study records in the Mapping Software any time, or start planning your next mapping cycle.
Open Mapping SoftwareNeed more from your kit?
Guides and resources
Templates, checklists, and protocols curated for Mapping Kit customers.
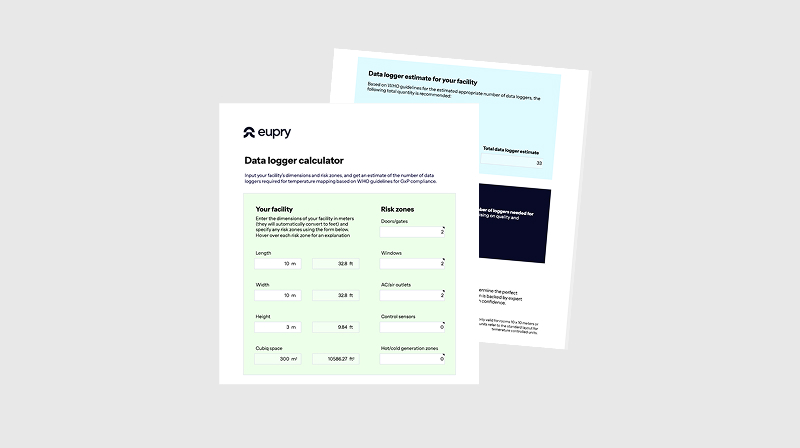
Data logger amount for mapping
Find out exactly how many loggers your space requires before you begin.
View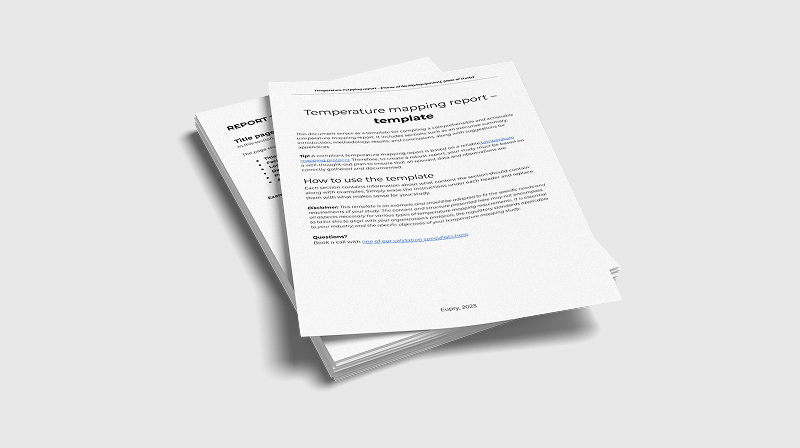
Temperature mapping report
A ready-to-use report template with practical examples for your final submission.
View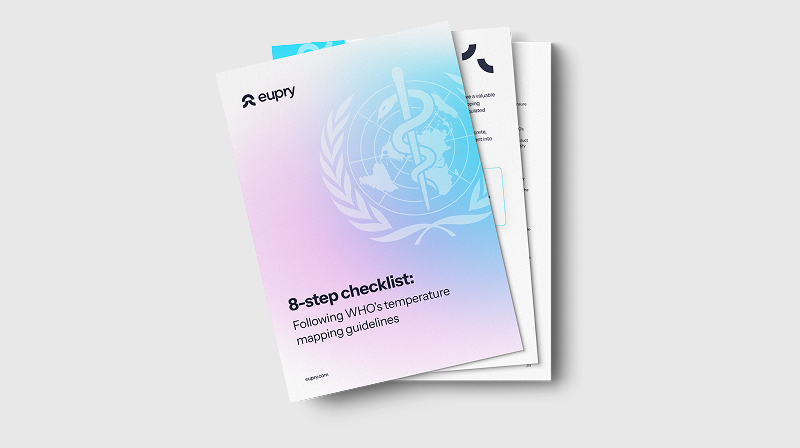
WHO's mapping guidelines
8 concrete steps aligned with WHO mapping requirements.
View
Temperature mapping in GxP
A 5-step guide covering planning, execution, and reporting in full.
View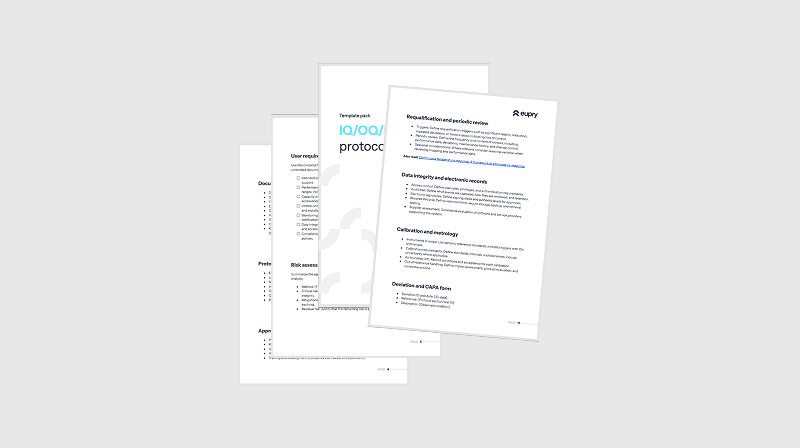
IQ/OQ/PQ protocol package
Protocol templates for qualifying temperature-controlled environments.
View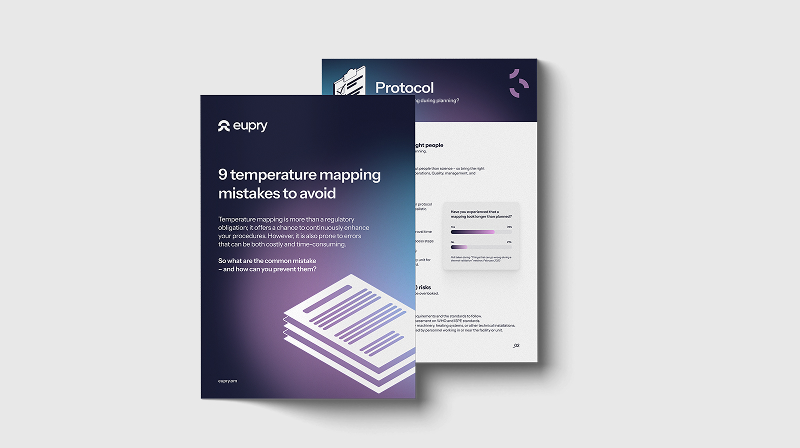
9 mapping mistakes to avoid
The most common pitfalls in temperature mapping - and how to prevent each one.
ViewKit component specifications
Technical data sheets for every device in your Mapping Kit.
Data Logger
Data sheetWireless, battery-powered recording device. Measures temperature, humidity, or CO₂ via external sensor probe. One reading per minute, uploads every 3 minutes via Live Data Hub.
DownloadSensor Probe
Data sheetIndividually calibrated external probe. Available in temperature, humidity, and CO₂ variants. Unique ID on side - matches calibration certificate in the Mapping Software.
Download
Basestation
Data sheetWireless hub that receives data from loggers and transmits to the Eupry cloud. Requires all three antennas attached before power-on. Supports Wi-Fi and 4G connectivity.
DownloadLive Data Hub
Data sheetReduces upload interval from 60 minutes to 3 minutes. Connect to the Basestation via power supply. Three front-panel indicators: Power, Wi-Fi, and Data Transmission.
DownloadNeed more from your kit?
Extend what your Mapping Kit can do - or get expert hands on your study.
Having trouble mounting your equipment?
Get an overview of every device in the kit, mounting options, and the placement approaches that work best for each type of space.
View mounting guide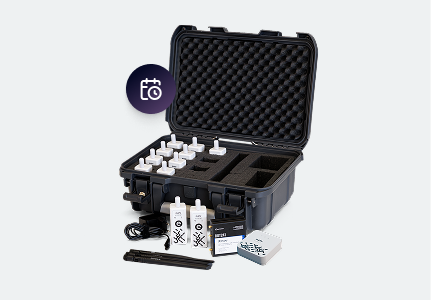
Turn your mapping kit into a subscription
We will ship freshly calibrated sensors when you need it - so your next study is always ready to start, with no calibration downtime.
Learn moreRent a new kit
Starting a new mapping project? Get a full Mapping Kit shipped to your site, ready to run from day one.
Rent a new kit
Need help executing your mapping?
Consult with or book Eupry's CQV team directly. Whether you need a protocol review, hands-on study support, or someone to run the full IQ/OQ/PQ qualification alongside you - our specialists are available to step in at any point.
Book a CQV consultationProduct update webinars
Feature deep-dives and new-release walkthroughs for existing customers.

Best practices: Get the most out of your Eupry platform
Understand the features and tips that make the biggest difference, plus a look at the biggest tech developments of 2026 so far.
Watch
What is new in pharmaceutical compliance technology?
Eupry Q1 2026 product update webinar. Dual compliance, Continuous Aircraft Mapping and Monitoring, and more.
WatchStuck? We have you covered.
Answers to the most common questions about setting up your Mapping Kit.
First, confirm the Basestation is powered on and the indicator light is solid green. Then power-cycle the logger by holding the button for 3 seconds and allow up to 2 minutes for it to appear. If it still does not show, check that the Basestation is on the same network and that no firewall is blocking port 443.
Configuring a study and activating it are two separate steps. In the Mapping Software, go to your study and confirm the status shows "Active" with a green indicator. If it shows "Draft" or "Configured", click Start Study to begin recording. Loggers will not record until the study is active.
Moving a logger after placement invalidates the spatial data for that position. If you need to adjust a logger, stop the study, document the deviation, reposition, and restart. Your qualification plan should specify the approved logger locations, and any deviation must be recorded.
In the Mapping Software, navigate to Equipment, select the logger, then Certificates. Certificates are also automatically attached to every generated mapping report, so they will appear in your final documentation without any manual steps.
Your qualification plan sets the required duration, typically a minimum of 24 hours per EU GMP Annex 15, though your protocol may specify longer. Mapping Software will flag if you attempt to stop the study before the required duration is met.